Saturday, December 29, 2012

13 Skills in 2013

http://13skills.com/
The hubby and I really enjoy listening to The Survival Podcast with Jack Spirko.  Jack is truly a "jack of all trades."  You will sometimes hear him discuss disaster preparedness, hyperinflation, economics, libertarianism, self defense, firearms, food and water storage, alternative and back-up energy, homesteading, and permaculture design all in a single episode.  It's a great way to broaden our knowledge and make better use of time where we otherwise would not be learning anything such as while doing work around the house, while commuting, or while filing and doing other administrative tasks at work.  I will warn that Jack and some of his guests do use "colorful" language at times, so if that's a problem for you, you may not like his show.  But if you can get beyond that, you will learn a lot from the show.

Jack keeps talking about this new website he launched called "13 Skills."  Basically, it's a website where you create an account, choose 13 skill categories in which you want to become more proficient during 2013, and then further define your specific goals with a brief comment on each category.  You can use the website to track and document your progress as well as connect with others in the community who are pursuing similar goals.  It was very very easy for me to quickly choose 13 skills for myself for 2013.  I think it was harder narrowing it down to just 13!  I have come a long way in a short time, but I also tend to bite off more than I can chew and get overwhelmed at times.  I think this website is a great little tool to sit down and think about what I really want to accomplish this next year across multiple categories.  Most of the skills and goals I chose are things I was already planning in my head to do anyway.  By setting and quantifying each goal in writing, I can make sure that I spend enough time on each to accomplish that particular goal, yet also make sure I limit my time on any single goal to ensure that I meet the other 12 I have set by year's end.

So without further ado, here are my goals for 2013, in no particular order of importance.  You can also check out my profile on 13 Skills here.

1. Fermenting
To master sauerkraut and at least one other type of ferment this year. Bonus points if I can make something hubby will eat and enjoy.

2. Food Storage
To beef up our stores until I am confident we have at least a 6 month supply (or better yet, 1 year). To re-configure and reorganize our pantry to accommodate our stored food better.

3. Gardening
To have a successful spring, summer, and fall garden in our backyard which meets at least 25% of our produce consumption needs during harvest time.

4. Permaculture Design
To read Gaia's Garden and to integrate at least 3 basic permaculture design elements into our backyard.

5. Building a Solar Oven
To educate myself and select a method for building the oven, to gather the required materials, to build the oven, and to practice cooking at least 3 different food items in it.
6. Butchering
To butcher at least 1 chicken from start to finish.
7. Canning
To learn how and to obtain the required equipment to be able to put up at least 20 cans of tomatoes this year.
8. Composting
To obtain a proper bin and attempt composting (again) until I am more successful. To make further use of vermicomposting where appropriate.

9. Midwifery
To educate myself further on natural and home birthing options. To read at least 2 books on this subject this year.
10. Self Defense
To identify and learn skills and weapons which will help me to be more situationally aware and able to defend myself, particularly when I am alone after dark (i.e., leaving work and church in the evenings).
11. Sprouting
To sprout, dehydrate, and grind whole wheat berries and to make at least 2 recipes using sprouted grain.

12. Shooting
To go shooting at least 4 times this year and to feel comfortable shooting at least 2 of our guns.
13. Animal Husbandry
To obtain our first flock of laying hens as well as our starter rabbits for meat. 

-----------------------------------
So there you have it - those are my 13 Skills!  To keep the motivation going, I intend to document my progress on each goal on this blog.  At the end of 2013, I will have to a do follow-up post to see how far I have come on each.

What skills would you like to gain or refine during 2013?

Friday, December 28, 2012

Must Watch: Back to Eden

If you have any interest in gardening, or if you simply love natural beauty, I highly recommend you watch the film "Back to Eden."  I have plans to bring in a big load of mulch from a local tree trimmer for my spring garden.  I love how Paul relates gardening to his relationship with God.  Check it out!

Yogurt Bowls


Based on my own personal experience and also from talking to friends, boxed cereals from the store can be one of the most difficult "junk foods" for people to give up when they want to start eating more of a whole foods diet.  Perhaps it's all of their slick marketing and false health claims.  Perhaps it's the sheer convenience.  Perhaps it's the good memories of fishing all the marshmallows out of your Lucky Charms as a young child.  It's easy to see why Lucky Charms, Cocoa Puffs, and Fruit Loops are bad for your health, but I have also learned that even the so-called "heart healthy" brands like Cheerios are highly processed foods that are no good for your health, either (or your pocket book, might I add).

It's a lot easier to give up sugary, expensive boxed cereal when you are trading for eggs, bacon, and sourdough toast with lots of butter.  However, most mornings, my hubby and I are in a rush and need something we can easily grab and go.  Hard boiled eggs are wonderful but get old after a while.  Smoothies are great but do take about 10 minutes or so to throw together.  My latest obsession for breakfast has been what I call "yogurt bowls."


How to make a yogurt bowl:

There's really no recipe here, but this is what we do.

Pour about 1/2 to 1 cup of yogurt (see my post with my thoughts and recommendations on yogurt) in the bottom of a pint mason jar (great for on-the-go) or a bowl.  Add on top your choice of:
  • Nuts (it's usually truly raw almonds around here, which would ideally be made into crispy nuts).
  • Fruit (sliced bananas, sliced apples, frozen berries, sliced grapes, peaches, etc. - whatever is seasonal and available to you - I wouldn't do more than 3 different types of fruit, though, or it might get overwhelming).
  • Granola (optional - the nuts can fill in just fine if you don't have any on hand, but be sure to check out my recipe for easy, delicious soaked homemade granola)
  • Healthy sweetener of choice if desired (around here, it's usually raw honey, but you could also use sucanut or real maple syrup).
During the week, I will combine the yogurt, sweetener, and fruit, and then put the nuts or granola on the side the night before.  Then we just grab and go in the morning and finish assembling and mixing it up at our desks once we're at work.

You can be as creative or simple with these as you like.  These yogurt bowls will make you never want to eat a Yoplait or Dannon with way too much sugar (or aspartame or high fructose corn syrup, as the case may be) and mushy fruit in the bottom again!

Soaked Homemade Granola in the Dehydrator


Ever since I went to my church's women's retreat last September, I have been craving granola.  The retreat center makes a truly amazing homemade granola that was served on top of (sadly) Yoplait yogurt for breakfast the last day.  I have never been much of a yogurt person until I got into real foods, and now I've developed quite a taste for it.  I knew I had to take this concept home and do it real food style.  It wasn't until I've had time off from work for the holidays that I got up the nerve to try making my own granola, and boy, am I glad I did.  This is a great addition to our morning yogurt bowls.

First, let me give credit where credit is due.  I used this recipe from Kelly at The Nourishing Home as a base.  Kelly based her recipe off this recipe from Shannon at Cooking God's Way.  I broke a lot of rules and therefore my recipe deviated quite a bit from what these two ladies have done.  I thought it warranted its own blog post since several people in the comments over at The Nourishing Home seemed to be wondering if this could be done in a dehydrator.  I am happy to report that it turned out wonderful.  See my technique below.  If you would like to make this granola with an oven or just get a couple alternative perspectives on it, I highly recommend you check out what these two ladies have done.

Thoughts on soaking grains:

I recommend soaking grains where practical on this blog.  You can read more about it on the Weston A. Price Foundation website.  A lot of people debate the effectiveness of soaking versus sprouting versus fermenting (sourdough).  There is some question as to how effective soaking really is at removing phytic acid and anti-nutrients in grains.  Because of this, I am not religious about soaking grains.  However, I will say that I typically notice an improvement in my ability to digest grains when I soak them first.  It also often times improves the taste and texture as whole grains can be very tough, chewy, and nutty (not always in a good way).  A good long soak will usually soften them up a lot.  Another reason I like to soak my grains is because it allows me to split the preparation time up into manageable chunks.  Sure, it may take more total time than if you skipped the soaking step, but my life consists of small pockets of time here or there, so if I can get something started soaking and finish the prep up later, I am often far more likely to have time to do it at all.  I am happy to say that while plain oatmeal will often give me horrible heartburn, this granola causes me no issues at all whatsoever.

Step One: Soaking

Ingredients
  • 6 cups organic rolled oats and/or steel cut oats (I used 4 cups rolled oats, 2 cups steel-cut oats since I ran out of rolled oats - whoops!)
  • 2 cups hulled buckwheat (groats)
  • 1/2 cup butter (ideally from grass-fed cows)
  • 1/2 cup organic virgin coconut oil
  • 2 cups homemade kefir (buttermilk or yogurt would also probably work)
  • 2 cups filtered water
Instructions
  1.  Melt butter and coconut oil in a double boiler or a small glass dish in your toaster oven on low heat.  Make sure you do not get it too hot, just slightly warmed and melted.  Pour into a large mixing bowl and add kefir and water.  Whisk to combine.
  2. Add oats and buckwheat; thoroughly combine using a large wooden spoon or rubber spatula
  3. Cover the bowl with a lid or plastic wrap and place it in a warm area of your kitchen for 24-48 hours.
  4. Once oat mixture is finished soaking, you're ready for Step Two: Dehydrating.
Step Two: Dehydrating

Ingredients
  • 3/4 cup raw honey
  • 3/4 cup pure maple syrup (not the fake stuff! you could use all honey and skip the maple syrup if you like)
  • 1 tsp sea salt
  • 1 ½ tbsp ground cinnamon
  • 1 tbsp pure vanilla extract
Yield: About 10-12 cups

Instructions
  1. After soaking time is completed, place honey, maple syrup, salt, cinnamon, and vanilla in a glass measuring cup. Place measuring cup in a small pot of warm water on the stove. Bring water to a gentle simmer, stirring honey mixture until melted and all ingredients are thoroughly combined. Do not get it too hot.  Turn off heat and remove cup from pan carefully, using an oven mit. Pour honey mixture over oat mixture.
  2. Using a large rubber spatula, combine the honey and oat mixtures, folding everything in together until well combined.
  3. Spread the mixture out on dehydrator trays.  I have the Excalibur 9-tray dehydrator, and I used 4 of the trays. 
  4. Dehydrate on the highest setting (155 degrees on the Excalibur) for about 8 hours until dry and crispy.  Then, pop the granola loose, breaking it up, and pour into air-tight jars (I used two half-gallon jars.  The picture at the top of this post was after we had eaten about 1 or 2 cups of granola - they were almost completely full initially).
  5. Depending on how quickly you eat it, you may want to store half in a jar in the pantry and half in a freezer bag in the freezer to preserve freshness.
Tip: Next time I will try spreading the mixture onto a piece of parchment paper on the counter, then transferring to my Excalibur trays.  The first time I made this, I spread the mixture directly onto the mesh tray liners and had a difficult time breaking all of the granola free when it was done because it got smooshed through the mesh and then dried in.  I will update the recipe once I have a better method.  You could try lining each tray with parchment paper or using ParaFlexx sheets (I don't have them yet).  If you go this route, you'll probably want to flip your granola halfway through and dehydrate a little longer than 8 hours since the granola will get less air circulation.

My Thoughts and Recommendations on Yogurt


 So you may be wondering what kind of yogurt I use in the delicious yogurt bowl pictured above.

I have used this recipe to make homemade yogurt a few times.  Homemade yogurt tastes exactly like yogurt should taste, but it will be much thinner...almost a runny consistency.  You could probably strain off some of the whey using cheesecloth, and it would be absolutely perfect.  You would definitely save some money and have total control over what ingredients are used and how your yogurt is made.  You could even try making a raw milk yogurt (something I have not yet attempted).

While frugality and thrift are very important to me and I like to do everything homemade as much as possible, I am in a season where I just don't have time for everything.  Some trade-offs have to be made.  If I can buy a descent store-bought version of something without paying an exorbitant premium, I use that to my advantage so my time can be freed up for something else.

In order of priority, what I look for in a plain, store-bought yogurt is that it:
  • Is organic, or even better, from grass-fed cows
  • Is whole milk (not low-fat or non-fat)
  • Contains as few ingredients as possible (ideally only whole milk/cream and living cultures - many brands, even organic ones, contain powdered milk and various gums, thickeners, and stabilizers which I try to avoid).
Regarding pasteurization: you will find that, even in most homemade yogurt recipes, the milk is first heated up and then cooled down before inoculating with the yogurt culture.  The reason is that this ensures the yogurt culture can thrive with no competition.  When making raw milk yogurt, the milk is only heated to about 110 degrees, thereby leaving much of the good bacteria and enzymes in raw milk in tact, but it's a very temperamental process.  So for me personally, it makes most sense to use my raw milk that's past its prime for making homemade kefir and to find a good pasteurized milk for homemade yogurt or a good pasteurized store-bought yogurt instead.  The yogurt cultures actually bring "dead" milk back to life.  It is relatively safe and healthy to eat yogurt made from pasteurized milk versus drinking straight pasteurized milk because the cultures do so much work to undo a lot of the damage that has been done in the heating process.

So now that you know what to look for, you are probably wondering if I can make it easy on you and tell you what the heck I use!


The above yogurt on the left is available at Trader Joe's for $2.99 for 32 ounces (2 pounds).  The above yogurt on the right is available at my local health food store for $4.29 for the same amount.

Would you believe me if I told you these are the exact. same. thing.?!

It's true!


The above photo is the back label on the Trader Joe's brand.  You can see the plant # is 06-93.  Using whereismymilkfrom.com, I traced that plant number back to - you guessed it - Straus Family Creamery!

Straus Family Creamery is an excellent company.  Their only drawback, in my mind, is that they pasteurize (but not ultra-pasteurize) their products.  However, their cows are treated well and are mostly grass-fed, they are certified organic, and they are a small, family-owned company that cares about its people, its products, and the environmental impact of its business practices.  I have bought their cream-top milk (also a bargain under the Trader Joe's label) and have used that when our raw milk is unavailable due to recalls, for example.

So in short, a good, happy compromise for me is to stock up on "Trader Joe's" (i.e. Straus) European Style whole milk yogurt every time I'm there.  It is absolutely delicious, a great price, and I have complete confidence in the quality.  I pretty much only use the yogurt for yogurt bowls since it is much thicker and milder than our kefir.  I use the homemade kefir in smoothies where I can better mask the very tart flavor.  Both are excellent foods to include in our diet which supply us with good healthy fats and a plethora of immune-boosting pro-biotic bacteria.

Tuesday, December 25, 2012

Thoughts on Prepping

Photo credit: http://www.scottliddell.net/
More than ever in my lifetime, these are uncertain times.  The news is full of talk of a "fiscal cliff."  Our economy has been struggling since the big 2008 collapse.  Our national debt is growing by the second. The price of gasoline keeps creeping up.  The integrity of the US dollar is being called into question.  As we learn more and more about where things "come from" and everything that has to happen for the industrial supply chain which enables our modern life to function, we realize we have been placing entirely too much faith in it, in our shaky economy, and in our often-times corrupt, not to mention inefficient, government.  This blind faith is perhaps due in large part to ignorance, and perhaps it is also due in part to this feeling of being completely and utterly overwhelmed, preferring to dig our heads in the sand than become one of those extreme, doomsday, hoarding, worry wart "preppers."  But, as anyone who has embarked down the path of real food, alternative health, and natural living will soon realize, the prepper community has a lot of overlap with these pursuits.  It just fits.  If you decide to take your food and health into your own hands, it doesn't take long to realize that, to the extent possible, you should take your self-sufficiency into your own hands as well.  My husband has hopped on board and really taken charge of this area of our life lately.  It has been a tremendous opportunity to bond and plan and dream together.  You know what they say, couples who prep together, stay together!  Okay, maybe I just made that up, but you get the idea...

We now find ourselves asking questions: what if the power goes out, even for just 2 or 3 days?  What if we go to turn on the faucet, and nothing comes out?  What if there's an earthquake?  What if one of us loses a job for an extended period of time (again)?  What if our nation goes through another Great Depression?  What if the rule of law fails?  What if life as we know it drastically changes?  As a believer in Christ, these thoughts are constantly tempered by knowledge of the Lord's grace and provision for us.  But just as I cannot expect a paycheck to come rolling in so I can keep the lights on and the fridge full unless I get up and head to work each day, I cannot expect that God will miraculously provide my needs in the event of a short-term or long-term disaster if I do not make use of the opportunities He has given me now to prepare.  God most certainly can miraculously provide, but His way of providing may be coming in the form of opening my eyes to the fragility of my everyday life and showing me how to prayerfully prepare for what may come.

We have realized that, whether things go south or not, a more self-sufficient lifestyle really appeals to us.  We are a ways off from owning 100 acres in the country and providing all of our own needs (though doesn't that sound nice?).  We are doing what we can within the constraints of our current time, money, and location available to us.  We are starting with the most basic and most likely "disasters": earthquake, short-term utility interruption (power, water, natural gas, sewer...), job loss, etc.  We are seeking to secure provisions to get us through 1 day, 3 days, 2 weeks, 1 month, 6 months, etc.  We are starting small and working our way up.  We are identifying holes in our plans and plugging them, one at a time.  I will be sharing some posts along our journey which may provide some inspiration to you on your own journey.  Maybe I can give you some things to think about.  Maybe I can present things in a way that is a lot less overwhelming.  I think prepping starts in the mind and manifests itself through small changes and choices as time and finances permit.  My desire is to help others make that transition in their mind and share some of the experiences I have which will enable them to make the changes and choices that go along with a new mindset.

Sunday, December 23, 2012

El Pollo Loco Style Chicken with Spanish RIce

My family ate a lot of El Pollo Loco chicken growing up.  I have had a major craving for their marinated chicken for a long time, and tonight I decided to try recreating it from scratch.  After a little internet searching and some of my own improvisations, I think I nailed it!  Give it a try - it's absolutely delicious and just as good (or better) than I remember.


El Pollo Loco Style Chicken Marinade

Ingredients:

Juice of 1 lemon
Juice of 1 lime
A generous splash of orange juice (or the juice from 1 orange)
A generous splash of pineapple juice (I had some frozen pineapple and just threw a few chunks in)
2-3 smashed garlic cloves
A couple tablespoons of olive oil
About a tablespoon of turmeric
Salt and pepper to taste

Whisk the above ingredients together and pour over your chicken pieces (we used chicken breasts) in a shallow dish.  Refrigerate for several hours before cooking on the grill.  I highly recommend reserving and boiling the marinade for dipping while you eat!

I made some Spanish rice to go with it and served with warm tortillas and sliced avocado.  It was delicious!

Easy Spanish Rice

If using leftover, pre-cooked rice:

Reheat rice on the stove.  Add a generous amount of tomato sauce or diced tomatoes (I eyeball it depending on how much rice I have).  Add some homemade taco seasoning to taste.  Add in corn, peas, and/or olives to your liking.  Stir well until heated through.  Add more of each ingredient until you achieve desired flavor/consistency.

If using uncooked rice:

I would just go ahead and cook the rice as usual, then follow the above steps to dress it up to be Spanish rice.

Wednesday, September 26, 2012

Vote YES on Prop 37!

To all California voters: please vote YES on Prop 37 this November to require labeling on foods containing GMO ingredients.  We all have a right to know!


Thursday, July 5, 2012

Frugal, natural, DIY carpet cleaning

We have approximately 1,150 square feet of carpet in our home.  The house was relatively new when we moved in, and for only about a year or two of use, the previous owners sure did a number on it!  It was in pretty bad shape, but the bank who sold us the home paid for the carpets to be professionally cleaned.  Stanley Steamer redeemed our poor, abused carpets for about $225 on the seller's dime.

They did such a good job that about a year or two later, we invited them back and spent $225 of our own funds to have them clean up our cumulative light use since we had moved in.  However, once we got our two Boston Terrier puppies, I knew I had to figure out a way to affordably clean the carpets more often...

The Machine

A friend lent me her Hoover Steamvac (a practically new yard sale find for about $30, I'm told), and I was in love.  It was easy to use and did a great job cleaning up after two adults and two puppies (with lots of potty training accidents along the way).  I knew I couldn't keep her Steamvac forever, so I started to do some research to make sure I wanted to invest in one myself.  I ultimately settled on the machine pictured to the right.  I bought it off Amazon with free shipping for $154.  Obviously if you keep your eyes out, the yard sale route is a good way to go.  This is exactly the type of appliance I am sure a lot of people buy brand new with good intentions...then after a couple uses and it sitting around, cluttering up a closet for a a few months (or years), they finally come to terms with the fact that it could be better used in another home.  And that better home could be your's!  Either way you go, if all you ever do is clean your own carpets once, it will more than pay for itself.  If it doesn't work out, you can always pass it along at your own yard sale in a couple of years...but if you're a frugal do-it-your-selfer like me, chances are it will be well worth its price tag and the closet space it occupies.  If you're not ready to invest in a machine, another option is to rent a Rug Doctor from your local grocery store.  The rest of the suggestions in this post can possibly be adapted to that machine, but I have geared it towards people using an at-home machine such as the Steamvac.


The "Shampoo"

If you purchase a Steamvac or other similar machine brand new, it will likely come with a small bottle of their special shampoo.  The instruction manual will tell you that you must only use their special shampoo, or the machine might explode!  So follow my suggestions at your own peril!  ;)

The problem with the "special shampoo" is that, like any other commercially available cleaning solution...
 1.  It's rife with unpronounceable and most often toxic chemicals and fragrances.  Not stuff you want your (or your small children's/pets') skin to come into contact with, not to mention the vapor you'll breathe in during the cleaning process and several days after as the fragrance wears off.

2.  It's expensive!  I believe they will sell you more of their special shampoo for somewhere between $5 and $10 a bottle...still cheaper than paying a professional, but not as cheap as it could be.

3.  It will inevitably leave a residue, ultimately attracting more dirt, causing you to have to clean you carpets more often and purchase MORE of their special shampoo!  I have also noticed that when using the special shampoos, it can sometimes leave your carpet crunchy/crispy if you do not rinse really really well.

My solution is...

Add a generous couple of cap-fulls (about 1 cup total, give or take) of distilled white vinegar to the shampoo compartment and dilute with piping hot water.  I just fill the Steamvac cap a couple of times (more or less, depending on how soiled the area I am cleaning) and then fill with super hot tap water.  The vinegar combined with the hot water serves to deodorize, disinfect, and loosen up dirt and stains.  And in case you are not used to cleaning your house with vinegar, I promise it will not smell like pickles when you are done!  I personally love pickles and have come to associate the smell of white vinegar with "clean," but even if you aren't there yet, trust me - the smell completely dissipates/evaporates, and all you are left with is a fluffy clean carpet that smells like nothing, which in my mind is the ultimate smell of clean.

One problem with the vinegar approach is that vinegar also serves to set colors, so if you have juice stains in your carpet, it may work against you...read more on Katie's experience with this at her post here at Kitchen Stewardship.  We don't have 
small kids yet, so our stains tend to be dirt/pet related, and I've never had that problem...however, my solution to that would be to either clean with hot water only, OR treat your stains first, then follow up with the vinegar/hot water solution outlined above.  Which leads me to my next point...

For Stains

There are all kinds of recipes online for homemade, natural carpet stain removal solutions.  Depending on the stain, you may want to seek out a more sophisticated solution.  What I find works well is to make a paste out of water and baking soda and scrub until the stain lifts out.  Then, when you follow up with the Steamvac, you will be rinsing the stain and any baking soda completely up out of your carpet.  If this doesn't cut it or you have a particularly stubborn stain, I would just try your luck with the different options on Google.


For pet stains, I have had a lot of success with Kids 'n Pets enzyme cleaner.  The ingredients aren't too bad - just enzymes, isopropyl alcohol, surfactants, and natural citrus scent (not overpowering, and it dissipates when it dries).  You want to completely saturate pet stains and allow them to evaporate fully with this stuff, that way the enzymes can get all the way down into the pad and eat up whatever it is that's causing an odor.  If you have a particularly stinky room, you can also add some of this cleaner directly to your carpet cleaner solution.  We bought a ton of this stuff when our dogs were puppies, and now that they are older and potty trained, I doubt we'll ever use it all up.  If we got to that point, I might experiment with something more natural or even homemade.  At the time, I was able to buy this stuff at Kmart and later off Amazon in a pinch and would feel okay recommending it based on my experience.


The Process

1.  The first thing I always do is thoroughly vacuum the entire area to pick up any dirt/hair/dust/crumbs.
2.  Treat any stains as outlined above.
3.  Mix up your carpet cleaning solution as outlined above.  Do this right before you go to clean so the water stays plenty hot.

 4.  Plug in and go!  I usually hold down the trigger for one complete pass forward and back, then let off the trigger and do another complete pass forward and back.  Do this in slightly overlapping strokes.

5.  Dump the tank and refill the shampoo compartment as needed.  If your rinse water is particularly dirty, consider going over the room a second time.  For a second cleaning, I usually will just pull the trigger forward, and let off the trigger back, so you are only doing one complete pass instead of two.  It just depends on how dirty the area you are cleaning is.

The evidence of a job well done!
It feels great to get this stuff out of my carpet!

6.  Open up the windows, turn on the fans, run your air or heater depending on the season...do whatever you can to get the carpet dry as soon as possible.
7.  Disassemble the shampoo compartment and dirty water tank, rinse, and allow to air dry.  Then, you're done!

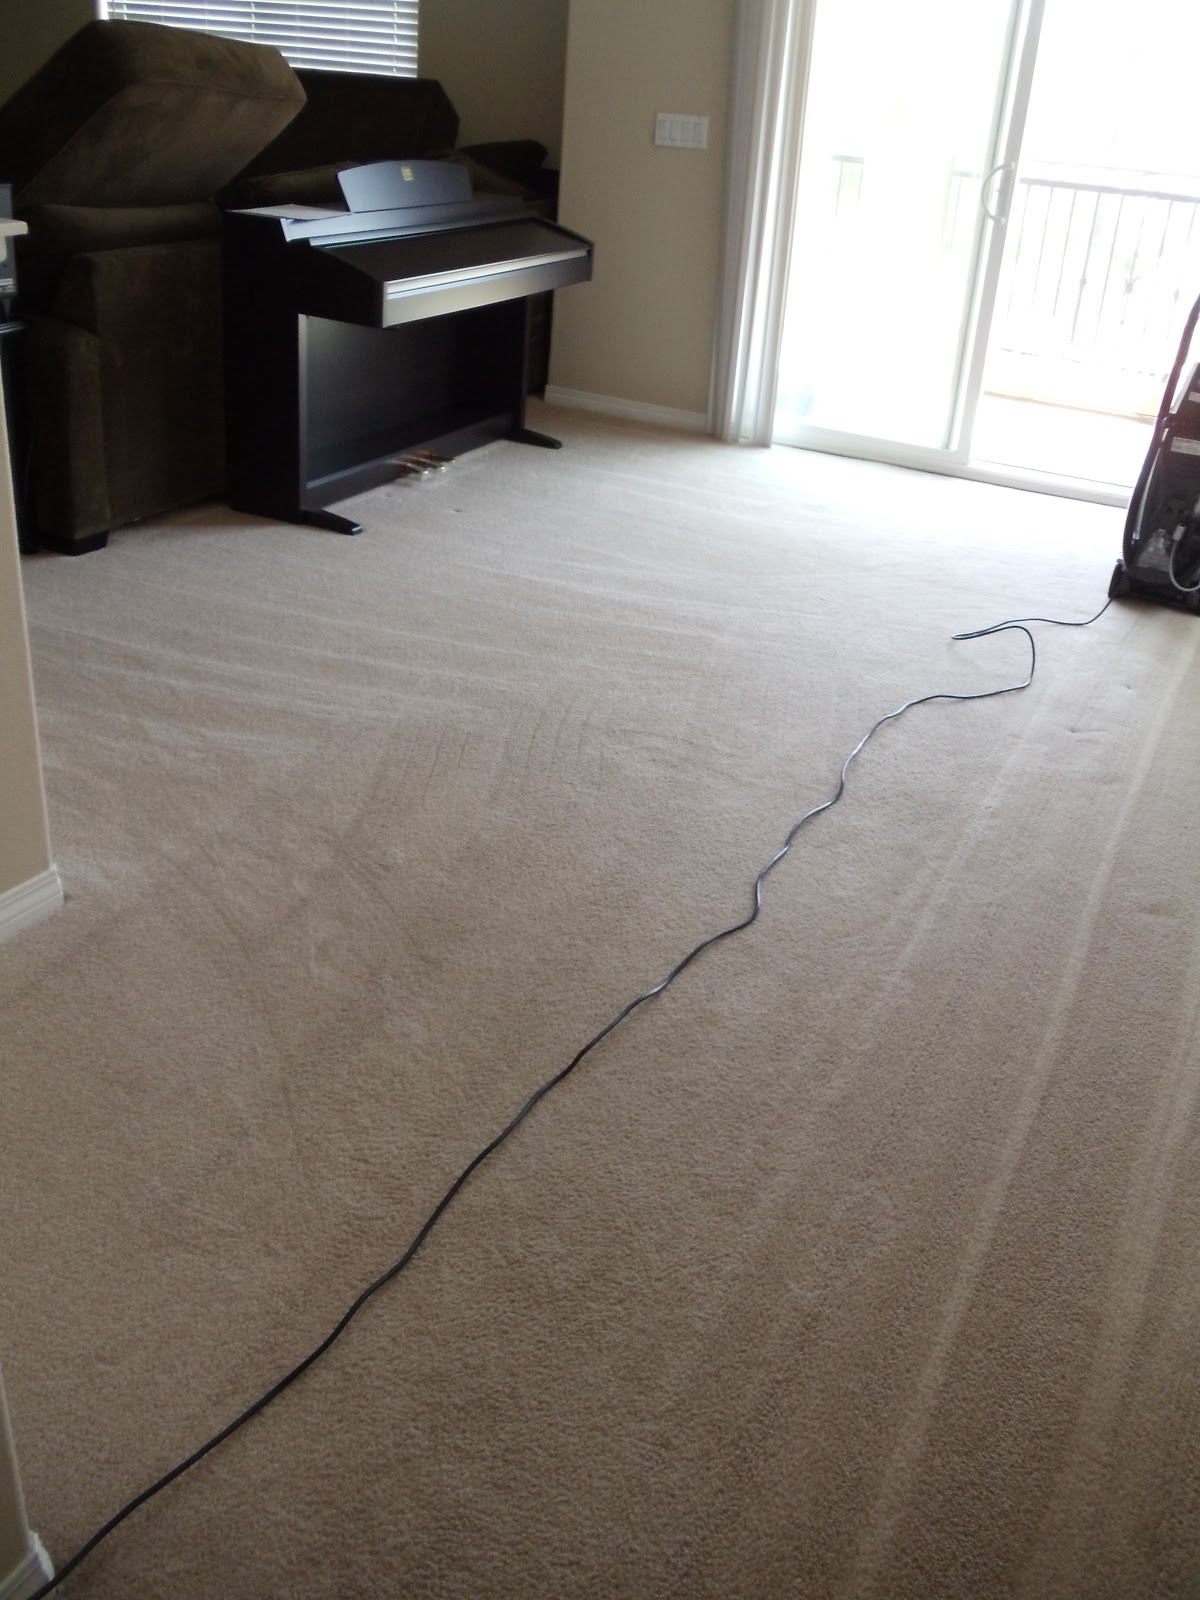
A couple during and after pics.  I was in too much of a hurry to get any good before pics, but our carpet wasn't terribly dirty looking before anyway...but it sure does brighten everything up once it's truly clean!

The left half hasn't been cleaned yet - the right half has.

View from the other side of the room.

And after - beautiful!  I love the streaks...even though they aren't completely straight...

After

After (no before pic for this part of the room).

Hallway before.
Hallway after.

A Few More Tips and Precautions

1.  The carpet in our house doesn't look too bad when it's all cleaned up, but it's not exactly brand new, and it's pretty "cheap" quality...all that to say that I have been pretty willing to take my chances and experiment.  If you have a newer/fancier carpet, you may want to be extra cautious and try things in a closet or other inconspicuous area first.  I know one danger when steam cleaning carpets is it can cause them to ripple in the middle once they are dry.  I have not had this issue, but you may want to proceed with caution depending on the type of carpet you have.

2.  It's a big job to try to clean the whole house at once like the professionals do.  I have never successfully done this.  The beauty of owning your own machine is you can do little sections as you have time and not spend any entire day turning your house upside down so the pros can come in and do their job.  Also - I won't tell anyone if you leave your big furniture where it's at and focus your more frequent cleanings on the higher-traffic areas!

3.  If you opt not to move your furniture, just be careful not to get the carpet wet near the edges of your furniture to avoid any dyes/stains from bleeding onto the carpet.  You can slip plastic wrap or wax paper under the legs of furniture to create a barrier if you're worried about this.  I usually just try to not to get too close, and it's not a problem.

4.  Ideally you will clean your carpets on a warm, dry day where you can open up and really let things air out and dry quickly.  Mildew is your worst enemy, so do what you must to keep air circulating and allow things to dry as soon as possible.

5.  Next time Fido has an accident or your two-year-old spills her juice, grab your Steam vac right away.  You can use it to suck up any liquid rather than blotting it further down into the carpet pad.  Once you have sucked up all excess liquid, treat the stain and rinse with hot water and vinegar (unless you're worried about the stain setting as in the case of juice).  It also comes in handy if you have a plumbing issue or some kind of leak that floods your carpet.  Use it to your advantage!

6.  Most of these carpet machines come with upholstery attachments.  I don't have any sticky kids yet, and the dogs aren't allowed on the couch, so I have yet to try this out.  But this is certainly a handy feature and is definitely something I will need if I ever get around to steam cleaning the carpet on our stairs down to the garage (they haven't really gotten so bad yet that I have wanted to invest the effort)...

So there you have it...that's just about everything I know about cleaning your carpets naturally and frugally.  I'd love to hear your tips or suggestions in the comments!

Saturday, June 9, 2012

Mark McAfee is my hero!

I am so grateful for Mark McAfee and the whole team at Organic Pastures for not backing down and, as he says in the video, coming back better and stronger, no matter what the regulatory agencies throw at them.  Thank you, Mark, for defending my freedom to drink raw milk!


My garden, 2012

I just wanted to show and tell about my garden.  I am off to a late start, but fortunately the growing season in southern California is long and forgiving.


This is the view as you step outside.  My garden is right outside my living room on a balcony area above our garage.


We set up garden boxes using the Square Foot Gardening method by Mel Bartholomew.  Each square is approximately one square foot, and we planted one crop per square.  Depending on the required spacing, you plant anywhere from 1 to 16 plants per square.  My husband built the boxes with plywood bottoms on them so they can go anywhere and be moved later if we change our mind about where we want them.  We need to work on getting a better drip system set up; for now I hand water what the drip misses.  The crops I have going in this box are, from top left to top right, bottom left to bottom right: bush beans, bush beans, lettuce, lettuce, cilantro, cilantro, green onions, and radishes.  I planted all of these crops directly in the soil less than two weeks ago and look at them grow!

This is the next box over from the one above.  The top row is all cantaloup. I bought a cantaloup at the farmer's market last weekend and put some of the seeds directly in the soil.  So far, two have sprouted.  They take up a lot of room and will need to be thinned later so I only have one plant per two boxes.  Not sure how it's going to go, but it was a risk-free trial!  The bottom right square is two cucumber plants which I started indoors and transplanted a few days ago.  It seems to have been a traumatic ordeal for these poor 'cukes, but they are hanging on and seem to be generating some new growth.  Praying they make it!

These are my old self-watering buckets which I started in the fall.  I have 8 of them and so far have transplanted two tomato seedlings into them for my spring/summer growing season.  I think they will work great for tomatoes since tomatoes like to send down deep roots.  I only have 6 inches of depth in the garden boxes whereas I have a couple feet in these buckets.  I just transplanted these guys this afternoon.  We'll give it a couple days and see how they do before I transplant 3 others I have going.
This box is the third one when you walk out my balcony.  I actually have four of these boxes for a total of 32 squares.  I have more space than I know what to do with at this point but have some seedlings going in the house which will hopefully start filling up my boxes!  I planted 4 sugar snap peas in the top of this square.  I bought them at the farmer's market and they sat in the fridge long enough to sprout, so I thought, what the heck?  We'll see what they do.  Since I could have fit up to 8 of the peas in this box, I filled the other half with two Swiss chard plants I started from seed and transplanted in.


So that's my garden so far!  In the fall, I planted a very small garden in my 8 buckets...I successfully grew a small crop of broccoli, a few carrots, and TONS of lettuces which kept growing and growing as I kept clipping and clipping.  I basically have 5 times the garden space now that I did then, and the weather is more-so on my side (we'll see how everything does in the harsh summer, though).  I do wish I had gotten some seedlings going indoors sooner, but I didn't have my garden boxes set up until about a month ago, and before that, I wasn't sure exactly what we were going to do.  So this is basically a continuation of my first year gardening.  It's been great learning what works and what doesn't.  I am sure as I learn and as time goes on, I will get the hang of things.

Today I just started a few more seedlings indoors.  Today at the farmer's market, I bought some beautiful purple bell peppers (apparently they do come in colors other than green, red, and orange/yellow!).  I am going to see if I can get a couple of those seeds to grow...and then I bought a yellow cucumber that I am also going to try to sprout.  I have some squash in the fridge and will see what I can do with those seeds, too.  I love using "free" seeds from veggies I buy at the farmer's market!

If you are new to gardening, I highly recommend you pick up Mel's Square Foot Gardening book (which I linked to above).  He makes it so accessible and simple.  I really like the concept of the boxes.  Lowe's sells his "Mel's mix" which consists of 1/3 peat moss, 1/3 vermiculite, and 1/3 compost blend.  It's much easier than trying to piece together the ingredients and mix them up yourself (which is an option he describes at length in his book if you can't find the Mel's mix in stores).  It cost us about $100 for all of the wood for the boxes and the soil.  Since you are starting with brand new soil from scratch, there's no plowing, no fertilizing, no tilling, no digging, minimal weeding, no testing, etc.  This is the part that really intimidated me as a new gardener, and using square foot gardening, I don't have to worry about any of it!  Mel recommends you have up to two 4 x 4 boxes per adult - one for a daily salad during the growing season, and the other for "supper veggies" during the growing season and beyond for preserving.  We currently have the equivalent of two 4 x 4 boxes with the four 2 x 4 boxes my husband built, which doesn't include the 8 buckets of tomatoes I have planned.  So we currently have enough room to grow over half of our produce needs with this small little balcony garden.  I have room for at least a couple more 2 x 4 boxes.  We own our home and have 1/5 an acre of land; however, our backyard is a construction zone at the moment, and this balcony is very easy for me to get to which means I keep things watered and maintained a lot easier.  Once our backyard is done, we can easily move these boxes back there if we want to...or maybe we will build more boxes for our backyard and have even more space to grow!!

So there you have it.  I will certainly keep you posted as harvest time comes!

Thursday, May 24, 2012

Good documentaries

I just watched two awesome documentaries.

Farmageddon and Fresh.  Both available on Amazon instant video for a small fee.  I highly recommend you check them out!

Organic Pastures recall ended

Late news but still good news.  I gladly loaded up on 2 more gallons of raw milk yesterday.  We rationed our supply and fortunately never ran out!  Yum, yum - praise God this was resolved quickly this time.


Thursday, May 17, 2012

Chocolate Chip Ice Cream


A big batch of my homemade chocolate chip vanilla ice cream - yum, yum yum!


I absolutely LOVE ice cream.  Growing up, I had a big bowl after dinner most nights (something I happily inherited from my mother!).  Unfortunately, once we started eating "real food," commercial ice cream posed a number of problems.  Many commercial ice creams contain propylene glycol (translation - antifreeze), and apparently the manufacturers do not even have to include this as an ingredient on the label because it is an "industry standard" food additive.  Sarah at the Healthy Home Economist has done an excellent article on it if you wish to do some extra reading here.  Another issue is that all of them use pasteurized (and most likely not grass-fed) milk/cream and refined sugars (even the organic varieties or Breyers, which is one of the better grocery store choices).  These are two things I strive to avoid.  And if we expand our scope to the more popular commercial offerings in the grocery store other than the more natural brands, we'll find a plethora of unpronounceable chemical additives, thickening agents, dyes, etc...


Enter homemade ice cream to the rescue!  Last summer, I picked up a 1.5 quart Cusinart ice cream maker at a garage sale for $5 (much like this one).  We got more than our money's worth out of this little machine...sadly, one day, the freezer bowl piece "jumped" out of the garage freezer and cracked, and we sadly had to retire the little champ.  I looked into buying a replacement bowl, but I was hesitant to invest the $30 they were asking when I had no clue how old the machine was and how long before the motor part might give out.  Vowing to be FAR more careful about situating the freezer bowl on stable terrain in the freezer going forward, I upgraded to this very similar 2-quart model, knowing it would earn its keep and be worth every penny after our many successes with the garage sale model.  I thought I would share our favorite recipe for a basic chocolate chip vanilla ice cream.  You can take the base recipe and add different things to it for different flavors, but it's just so darn good I usually stick to plain old chocolate chip!

Homemade, Chocolate Chip Vanilla Ice Cream

Serves about 6

Ingredients:

2 cups cream (preferably grass-fed and raw - I just pour the cream off our raw milk)
2 cups milk (preferably grass-fed and raw)
2 raw egg yolks (I would skip this step unless you can buy from a clean, organic, pastured source)
1/2 cup sweetener (my favorite choice is maple syrup - you could also use honey or rapadura)
2 tablespoons vanilla extract (use real vanilla extract if possible)
1/4 cup or so of chocolate chips (I found a wonderful organic, fair-trade, 72% dark chocolate bar at Trader Joe's which has NO SOY - I am in heaven!  I chop part of this up and add it to our ice cream)

Directions: Combine the cream, milk, egg yolks, sweetener, and vanilla extract in a large bowl or pitcher.  Whisk together with a fork.  I use my immersion blender to ensure a very smooth texture.  This also incorporates a lot of air into the mixture which will give your finished ice cream a much softer texture.  Pour into your ice cream maker and run according to the machine's directions (about half an hour or so on the Cuisinart we use).  You can add in the chocolate chips at any time, but most machines recommend adding towards the end.  Once done, the ice cream will be a "soft-serve" consistency.  It is delicious at this point, but if you desire, you can scoop into a shallow dish or into pint-sized jars in individual servings and freeze for an hour or so to get a firmer texture.  I like to make a big batch, freeze in jars, and then we have ice cream on demand for a couple of days before we devour it all!

Here are a few more comments I have from lots of personal experience, trial and error...I don't advise putting the ice cream mixture into a blender for the pre-mixing step.  I did this once, and it heated my ice cream mixture into an unpleasant custard texture.  My immersion blender is great because it does not heat the mixture up - a whisk would do just fine, too, as I mentioned above.  No matter what you do, homemade ice cream tends to have a more "icy" texture than commercial varieties.  This is why you want to lightly scoop into individual jars or a shallow dish.  Do NOT pack the ice cream down or you will eliminate the fluffiness that helps make for a smoother texture.  Also - make sure your freezer bowl is VERY frozen.  I usually have to leave our's in the freezer for at least 2 days for it to be fully frozen.  We have a nice big freezer in the garage for storing our meats, and I make darn sure there is always enough room to keep our ice cream bowl in there so I can make ice cream whenever I want!  You also want to be sure to run the machine long enough to get the ice cream as cold and frozen as possible.  If your ice cream is very melty before you transfer to the freezer, it will still taste good, but it will have an icy sorbet texture to it which is edible but not desirable.  I have read that adding a little vodka or rum to the ice cream also helps to make for a softer ice cream because it does not harden when it freezes.  I think this really does work because I make our ice cream with my homemade vanilla extract, which is made by combining vodka and whole vanilla beans and allowing to sit for weeks, months, even years to draw out the vanilla flavoring.  You are only adding 2 tablespoons for six servings - so it's not enough to cause any harm, and it has the added benefit of improving the texture of the ice cream!  If your vanilla is not made with vodka or rum, you might consider adding a little to improve the texture.

As you can see, I am very enthusiastic about our homemade ice cream.  When made with grass-fed raw cream/milk and such a small amount of natural sweetener like maple syrup or honey, I would honestly consider this a health food.  I have justified eating it for breakfast on many occasions because I believe the raw milk, cream, and egg yolks are so nourishing!  So go ahead and indulge!

Tortilla Chips

A reader (thanks again, Steve) asked what I use for tortilla chips.  To be perfectly honest, for a long time, I was just buying organic corn chips from Trader Joe's.  The downside is that these were always made with some type of vegetable oil, which I really strive to avoid as they are highly processed industrial food products and are not at all what I would consider a "real food" or a good fat.  It's definitely a topic for another post (someday), but to give you a brief, non-scientific explanation - these oils are highly processed and rancid due to the manufacturing required to get the oil in the first place (when's the last time you squeezed a kernel of corn and out came oil?), they create free radicals in the body (in other words, they cause cancer), they are heavy in omega-6 fatty acids (most of us need more omega 3s - not more 6s), and overall they behave in a very toxic manner once inside the body.  Most of us know now that sticking to butter (pardon the pun) is a much healthier choice than margarine (which is rumored to be very close to plastic on a molecular level!)...well, margarine is made of vegetable oils, if that tells you anything.  These oils are something your great (great, great) grandparents had never heard of - they are a modern, industrial "frankenfood" to say the least.  Avoiding them is nearly impossible unless you cook from scratch and eat real food where possible!

Now, I would love to make my own corn tortillas from scratch and deep fry them in lard or tallow or even refined coconut oil (all healthy, natural, stable fats)...but I am just not sophisticated enough to do that at this point.  So my compromise, which I feel is a huge improvement from buying chips made with vegetable oil is this: I make my own restaurant-style chips using store-bought, (ideally organic) plain corn tortillas.  Look closely at the ingredients - at Trader Joe's, I can find tortillas where the only ingredients are corn, water, and traces of lime.  Find the best you can with the shortest, most simple ingredient list possible.  I make them in the oven using olive oil, another healthy natural fat.  One word of caution with olive oil - there are those who say it should never be heated because it is a very fragile oil with a low smoke point.  I would agree, and I never cook over high heat on the stove with olive oil; however, I find that baking with olive oil on a limited basis is usually pretty safe and definitely healthier than consuming vegetable oil in any form.  But if you really don't want to use the olive oil, you can skip it all together and just bake them plain - they will still get plenty crispy.  So with all that background, below is my "recipe" for a good compromise tortilla chip.  We don't eat these often, but they are definitely a treat on occasion!

Health(ier) Tortilla Chips

Ingredients:

1 package organic corn tortillas
Olive oil
Sea salt

Directions: You can make a bunch at once and store the leftovers for a couple of days, or you can make only what you are about to eat and freeze any leftover tortillas for next time.  Cut tortillas into triangles.  Drizzle/brush with olive oil, sprinkle generously with finely ground sea salt, and bake in the oven (or toaster oven) at about 350 degrees for about 5 - 10 minutes until desired crispiness is obtained.

Taco Seasoning

One of my readers (thanks Steve) asked what I use for taco seasoning.  Trader Joe's actually sells a descent pre-mixed envelope of taco seasoning which I've used in a pinch (all of the ingredients are pronounceable with no sign of MSG or anti-clumping agents); however, I buy organic, non-irradiated spices in bulk, and it takes only seconds to mix up a whole bunch of my homemade taco seasoning.  I haven't done the math, but I am sure it's more economical as well.  I use it in my chicken taco soup recipe and whenever I need to brown beef or chicken for tacos, enchiladas, etc.  The below recipe makes 4 times a regular batch, which should last you several meals.  I have a low tolerance for spicy foods, so you may wish to adjust and use a spicier chili powder according to your tastes.

Homemade Taco Seasoning

1/4 cup chili powder
1 tsp. garlic powder
1 tsp. onion powder
1 tsp. oregano
2 tsp. paprika
2 tblsp ground cumin
1 tblsp finely ground sea salt
1 tblsp black pepper

Just add these ingredients one by one to a small jar, stir, label, and store in your pantry with your other spices!  Use to your liking in all of your Mexican dishes calling for taco seasoning.

Organic Pastures recall May 2012

Here we go again...Organic Pastures raw dairy has been recalled again.


I know I take on risk when I drink Organic Pastures raw dairy.  There is no 100% guaranteed safe food...pasteurized or not.  For me, the benefits of raw milk from healthy, happy, organic, grass-fed cows continue to outweigh any risks.  I completely trust Organic Pastures to do everything they can to provide a safe, healthy, nourishing product to me and my family.  It is incredibly aggravating when these recalls happen to Organic Pastures as they are my only source of raw milk.  The health officials are urging anyone with any remaining Organic Pastures raw dairy products to dispose immediately...instead, I am savoring every last drop and praying the recall is lifted as soon as possible.  Thank you, Mark and the rest of the Organic Pastures family for your determination to continue meeting the demand for this nourishing food.  I will be stocking up as soon as your products return to the shelves.

Saturday, March 10, 2012

Chicken (or Ground Beef) Taco Soup


The below recipe was a favorite of mine prior to switching to a real foods, traditional diet.  I made a few tweaks, and now it fits the bill as something you can feel good about feeding your family.  The best part are the fresh toppings that you can heap on top!  Enjoy.

Chicken Taco Soup
Makes about 5-6 servings (considering it's so yummy you will probably eat a lot of it at each sitting!).
  • 1/2 onion, chopped
  • 3 cloves garlic, minced
  • 1 (16 ounce) can kidney or white beans, rinsed and drained**
  • 1 (15 ounce) can black beans, rinsed and drained**
  • 1 ¾ cups frozen corn
  • 1 ½ cups chicken broth or stock
  • 1 28-ounce can diced tomatoes (undrained) or 3 cups diced, peeled, fresh tomatoes
  • 3-4 tablespoons taco seasoning
  • ¾ cup shredded/diced, cooked chicken
Toppings: tortilla chips, cilantro, fresh-squeezed lime juice, shredded cabbage, sour cream, cheddar cheese, sliced avocados, green onions, etc.

Sauté onions and garlic in a little butter until aromatic and just softened.  Add beans, corn, chicken stock, tomatoes, taco seasoning, and chicken.  Simmer for about ½ hour.  Serve warm with toppings.


** Regarding canned beans: I keep a few cans of canned beans in the pantry for last-minute dinner emergencies; however, I usually try to cook my own from dried beans and keep a stash in the freezer to use in recipes instead.  Why not use canned beans?  First, they are more expensive and usually have added salt and sometimes preservatives.  Secondly, beans are most digestible (if you know what I mean!) when they are soaked for a long period of time in an acidic medium or a little baking soda prior to being cooked, and most canned beans do not go through this long soaking process.  Lastly, most canned beans (except for Eden Organics brand and maybe a couple others) are in cans lined with BPA.  Yes, BPA - that nasty hormone-disrupting chemical in certain plastics that everyone's afraid of nowadays.  People are very concerned with using BPA-free plastic containers and water bottles, yet our primary exposure actually comes from leaching from the linings of canned foods.  Last I checked, it's impossible to buy canned tomatoes, for example, without BPA (if you can get Pomi brand tomatoes in tetra packs, these are a good alternative I have found).  I have gotten pretty creative in trying to minimize our exposure to BPA as a result, and considering all of the other benefits, I really try to do this with beans especially.

So, your options for this recipe would be to substitute 3&1/3 cups of precooked black, kidney, pinto, white chili, etc., beans for the 2 cans of beans listed above.

OR

Try this Slow Cooker Modification:

Soak 1&1/3 cups of dry beans: your choice of black, kidney, pinto, white chili, etc. in a glass or ceramic bowl in plenty of luke-warm water with a couple tablespoons of an acidic medium (such as liquid whey, lemon juice, or raw apple cider vinegar) and/or a pinch of aluminum-free baking soda.  Soak for at least 12 hours, as long as 24 or 36 hours.  I find that 12 hours is not quite enough to prevent indigestion, so 24 or more hours is what I find to work best.

Rinse beans well after soaking.  Combine beans, onion, garlic, corn, chicken stock, tomatoes, taco seasoning, and chicken in slow cooker.  I would also suggest adding 1/4 to 1/2 cup of plain water or extra stock to allow for some of the liquid to cook off and absorb into the beans.  Cook on low for 8-10 hours or until beans are tender.  Serve warm with plenty of toppings.

If you really like this soup - try making a double batch and freezing leftovers in wide-mouth quart mason jars in the freezer.  Just be sure to allow at least 1/2 an inch of head space to allow for expansion once frozen.  Don't use regular mouth jars - the necks are too narrow and they will crack once frozen.

Update 12/28/12 - Ground Beef Modification:

This  recipe is still a favorite in our house.  It is my go-to chili recipe, except I never got the idea before to heap all the wonderful fresh toppings on top of my chili (except for just plain cheese and sour cream if you like that sort of thing).  I find now that I always make a double batch in the slow cooker using dried beans.  I have also started substituting about 1 pound (or close to 2 pounds, for a double batch) of hamburger meat for the chicken.  We buy 1/4 steer at least once per year, and we always have plenty of hamburger on hand.  I love hamburger in a slow-cooked stew or chili such as this as it greatly tenderizes the texture, and this is a fabulous way to use some of it up.  I just brown the hamburger meat with the onions and garlic and about half of the taco seasoning and then add it to the slow cooker with all the other ingredients.  After eating our fill for dinner and lunches over the next couple of days, I usually end up with at least 2 or 3 quarts to freeze and thaw for easy dinners later.  I just love this recipe!